Test your customer's email campaign experience
Create a campaign and send a test email to yourself to experience what happens when your customers receive your email campaign.
March 22, 2026Marsello provides tools to create and manage email campaigns tailored to specific audience segments. By leveraging tags and segmentation, you can ensure your messages are reaching the right customers for maximum engagement. Create a campaign and send a test email to yourself to experience what happens when your customers receive your email campaign.
🏷️ Email campaigns are unlocked with the Marketing add-on.
🏷️ Custom segments are unlocked on the Loyalty Accelerate plan.
⚠️ Important: Email providers are now stricter than ever. It is highly recommended to send by a personalized email domain. This will help ensure your emails are delivered to your customers and not being marked as SPAM.
📖 How to set-up a custom email domain in Marsello
Create a custom segment for internal testing
To create a custom segment, you need to have a customer account on Marsello. If you don't have an account, simply add yourself as a customer on your POS or eCommerce platform, this will sync your email address into Marsello.
1. In your Marsello admin, go to Customers > Segments and click Create segment.

2. Name your segment e.g. Email Test Group and then click Add Condition to add your first segment condition.

3. Under the conditions, in the drop-down, click on the condition you wish to segment by. In this example, we will be using the Email condition. To create an email based segment, select Email from the first drop=dop, then is from the second drop-down and under enter specific email address you are after.

[OPTIONAL]: If you want to add more than one email address to this segment, you can follow the below steps:
-
Under Segment conditions, click Add Group then click OR to update the group conditions
-
Click Add Condition and use the conditions "email" "is" and enter the email. Repeat this step until you have added all the required emails. For testing segment-based automations, it is recommended to use a fresh contact with a unique email address to avoid potential conflicts with automation processes.

4. Click Save and Create Segment. Your segment will now show under Segments and as an audience option in Campaigns.


How to send an email to a custom segment
1. In your Marsello admin, under Marketing > Campaigns > Email and click Create Campaign.
2. This will open up the email template for you to design and customize. Once finished, click save and continue to update the email settings.

3. Complete the Campaign Settings form and then scroll down to Audience Settings.
4. Under Audience settings, under Choose your audience, click Selected customer segments, and then scroll to Custom Segments, then select your segment
You can also choose to send campaigns to all customers, a specific segment, or selected sites, giving you flexibility in how you target your audience.

5. Once the form is completed, click Save and continue to review. This will open up an email sending confirmation page. Once you have reviewed the details, click Schedule or Send Now.

Your email campaign will then begin to send, this process can take up to 15 minutes to complete.

View the campaign as an email recipient would
1. In your email inbox, open your email campaign.

2. Review your email content and design
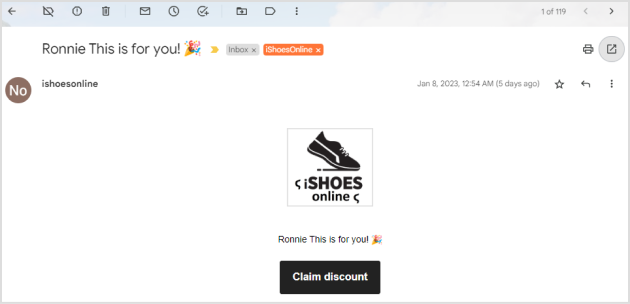
3. Click the links and buttons (if any) within your email to confirm they are redirecting to the correct location and working correctly.
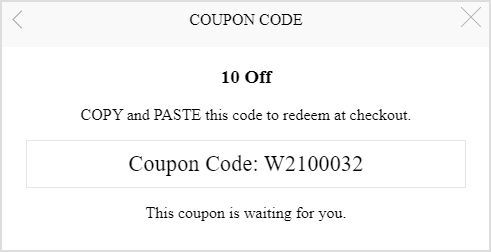
4. Test the claim discount button by clicking on it to generate a unique discount code. This will lead you to your loyalty widget open with the unique discount code which you can use at checkout. Proceed with using the discount code during checkout to ensure it applies correctly and reflects any predefined conditions.
📝 Note: This is an active discount code. You can use this discount code online (or in-store) to test the redemption process. Or if you want to delete this discount code you can do so by following these instructions.

Making final edits and sending this campaign to your customers
1. In your Marsello admin, under Marketing > Campaigns > Email and locate your test email campaign. From the actions drop-down menu, select Clone to duplicate this campaign.

2. Click on the campaign's name to open it. This will bring you to the campaign settings form. Should you need to make any tweaks to your email campaign, please click on the Edit Email button and update before proceeding with the steps below.
3. In Campaign settings, update any required text including the email subject line.
4. Under Choose your audience, select send to all customers or selected customer segment(s)
📝Note: Audience selection is not saved by default, so you will need to reselect your audience each time you create or edit a campaign.

5. Once the form is completed, click Save and continue to review. This will open up an email sending confirmation page. Once you have reviewed the details, click Schedule or Send.

Your email campaign will then be ready to send to your chosen customers at your chosen time.
FAQs
Q. Why doesn’t the audience selection stay saved?
A. Audience selection is designed to be a manual process to ensure accuracy and relevance for each campaign. You must reselect your audience every time you create or edit an email campaign.
Q. Can I send a single email campaign to all contacts across multiple locations?
A. Yes, you can send campaigns to your entire contact list at once, regardless of location. This allows for streamlined communication without the need for location-based segmentation unless specifically required.
Brands also searched for: campa, camkp