How to manually add a customer(s) to VIP tier(s)
April 1, 2026
🏷️ Manually adding customers to VIP tiers is unlocked on the Loyalty Accelerate plan.
You can manually move an individual customer or a group of customers into a higher or lower VIP tier — without them needing to meet that tier's normal spend or points requirement. This is useful for rewarding loyal customers, correcting a tier error, or running a promotion.
📝 Note: Customers automatically enter the next VIP tier once they meet that tier's entry requirement — either points earned or amount spent.
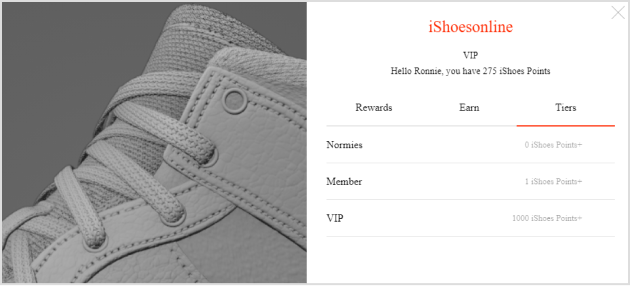
Learn more about VIP tier entry requirements.
How to assign an individual customer to a specific VIP tier1
1. In the Marsello admin, go to Customers > All customers and search for the customer by name, email address, or mobile number.
2. Click into the customer's name to open their profile.
3. Under their customer profile, click Actions > Assign to VIP tier.
4. In the drop-down, select the VIP Tier you'd like to assign them to.
💡Optional Step: If you'd like this customer to stay on this tier for their lifetime with your store, select Lock the customer to the tier. Leave this unselected if you want the customer to move between tiers automatically based on their spend or points.
5. Click Save.
📝 Note: To remove a customer from their current VIP tier, follow the same steps above and assign them a new tier.
How manual tier assignment affects spend and points tracking
When you manually assign a customer to a VIP tier, Marsello adjusts their year-to-date (YTD) spend or points total to match that tier's entry threshold. This keeps the customer in the assigned tier and prevents them from being automatically downgraded.
📝 Note: This adjustment only affects the number used for tier entry and retention. It does not add real transactions, points, or spend to the customer's account — it only changes their tier-tracking total.
Example
Jordan has spent $60 in 2026 and sits in the Base tier.
You manually assign Jordan to the Silver tier, which has a $100 entry threshold.
Marsello sets Jordan's YTD spend (for tier-tracking purposes only) to $100 — matching the Silver tier threshold. This stops Jordan from being automatically downgraded the next time their real spend is checked. Without this adjustment, Jordan's real spend ($60) plus a small purchase (say $10) would total $70 — still short of the $100 needed to stay in Silver — triggering an automatic downgrade back to Base tier.
What this means for future upgrades
Because Jordan's YTD spend is now set to $100, they only need to spend the difference between their current tier's threshold and the next tier's threshold to upgrade — not the difference between their real spend and the next threshold.
| Threshold | |
| Gold tier entry | $200 |
| Silver tier entry | $100 |
| Amount Jordan needs to spend to reach Gold | $100 ($200 - $100) |
Without the tier-tracking adjustment, Jordan would have needed to spend $140 ($200 − $60) to reach Gold based on their real spend.
⚠️ Important: This adjustment happens every time a customer is manually assigned or moved to a new tier — their YTD spend/points total is reset to match the new tier's entry threshold, not their actual historic spend.
How to bulk assign a group of customers to specific VIP tiers
⚠️ Important: Your VIP program must be enabled before importing a bulk VIP list. If the VIP program is not active, the import will not correctly assign customers to VIP tiers.
Prepare your CSV file
1. Open your CSV as a spreadsheet of your customers.
2. Delete all columns except the following:
- First Name (required)
- Last Name (optional)
- Email Address (required)
- Mobile (optional)
- VIP Tier Name
⚠️ Important: First name and email address are required. If these values are missing, the file cannot be imported into Marsello.
3. Update your column headings to match the following:
| Your column | Rename to |
| First Name | Firstname |
| Last Name | Lastname |
| Email Address | |
| Mobile Number | Mobile |
| VIP Status | Tiername |
4. Check that your Tiername column follows these rules:
- The value must match a tier name in your VIP Program exactly. For example, if your tier is named "Gold Tier," entering "Goldtier" or "Gold-tier" will not assign the customer to that tier.
- If the Tiername value is empty or null, the importer checks whether the customer already has a VIP tier. If not, they're assigned to the base tier of your VIP Program.
- If the Tiername value is "basetier," the customer is assigned to the bottom tier of your VIP Program.
5. Save your spreadsheet as a .CSV file
💡Quick Tip: To save a file as a .CSV, in the spreadsheet tool, this can often be found under Export to or Download as in the settings menu.
Import your customers & their VIP status to Marsello
1. In the Marsello admin, go to Customers
2. Click Update customer list
3. Drag-and-drop your CSV file to upload box
4. Select your header row, then click Next. Your header row is the row with the column headings in the spreadsheet.
5. Map your Column headings, then click Next
Match the column heading in the template field to the correct heading of your CSV file.
6. Verify Data
-
Check that all details are in the correct fields (e.g., first names in First Name, valid emails in Email).
-
Fix any errors in-app within the table or offline by selecting export.
Fix import errors
You can fix errors either in-app or by exporting the file.
Fix errors in-app
Use the Invalid tab to quickly find issues. Any row with an error appears in red — click into the field with the error to update it.
Fix errors via export
Click Export to download your data as an .xlsx file. Rows with errors appear in red, and hovering over a row shows a detailed description of the error.
💡 Quick tip: Open the exported file in Excel or Google Sheets and filter by color in each column to show only invalid rows. Click into each flagged field to make the update.

When your file is ready, close the previous import and upload your corrected file. Complete the upload and mapping steps again to cleanly import your updated data.
⚠️ Important — common causes of invalid rows:
- Blank rows
- First name doesn't start with a letter, or contains symbols (#$^&)
- Invalid email format
- Mobile number doesn't start with a country code or valid digits (e.g., +6127123123 or 027123123)
- Extra whitespace at the end of an email or mobile number
- File contains more than 100,000 customers (maximum limit)
- Remove unwanted entries by clicking the X in the Remove column.
Submit your import
1. Click Submit.⏳ Imports may take up to 24 hours, depending on file size.
Your customers will begin importing, and their VIP tier status will update (up or down) to the tier you specified.
📝 Note: If you assign a customer to a tier manually, they'll remain in that tier unless you've enabled VIP Tier Expiry in your global settings. If expiry is enabled, customers stay in that tier for the remainder of the current year and the following year.
Your customers' experience
- The next time a customer makes a purchase in-store or online, they'll earn points using their new VIP tier's earning rules.
- Their VIP status will display on your loyalty widget's Earn tab, where they can see how many points they've earned in total.
- Customers can also see how many points they'll earn per purchase under the Tiers tab.
Brands also searched for: buklk, vulk, biulk, pointsimpo, pointsimp