Get private post-purchase feedback from customers to improve your store without using social media.
🏷️ Customer feedback is available on all Marsello pricing plans.
Customize the design, follow-up questions, and possible multiple-choice answers to your Feedback survey. You can also customize or translate the text into your preferred language, voice, and tone.
How do I customize my feedback survey?
- In your app admin, go to Customers> Responses > Feedback and click on the Edit feedback request button.
Here you can view the Survey Question and Feedback response pages. These are set up with best-practice survey questions to measure customer feedback or you can customize these to match your store's brand, voice, and tone.
Customize email block
- Click the Email Block tab to customize your survey question

- Under Feedback Icons, click Choose File to update and select new feedback icons from your computer
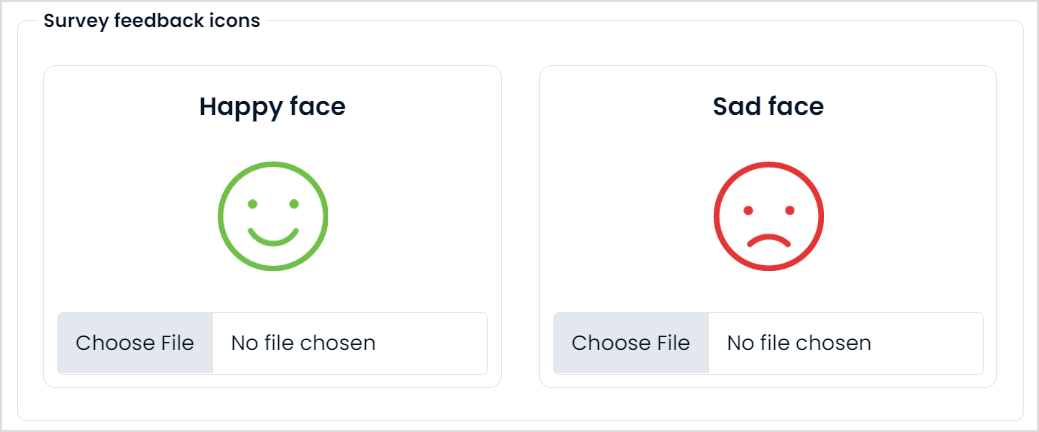
- Click Save changes
📝 Note: These question and feedback icons will be added by a merge tag on the Earned Points Loyalty Automation.
Customize survey
Once your customer has responded to the satisfaction survey, you can then prompt them with additional questions to further understand what was great or could be improved.
💡 Tip: Want to offer your survey in another language? You can translate it by following the customization steps below.
- Click the Survey tab

- Under Headers, edit the text for the different feedback response types
-
Happy header
-
Sad header
-
Change my answer label
If your customer has accidentally responded with the negative icon, they can then update this to be the positive response.

- Under the Options tab, customize your feedback for multi-choice reasons.
These are the possible reasons that the customer is offered when they leave positive or negative feedback.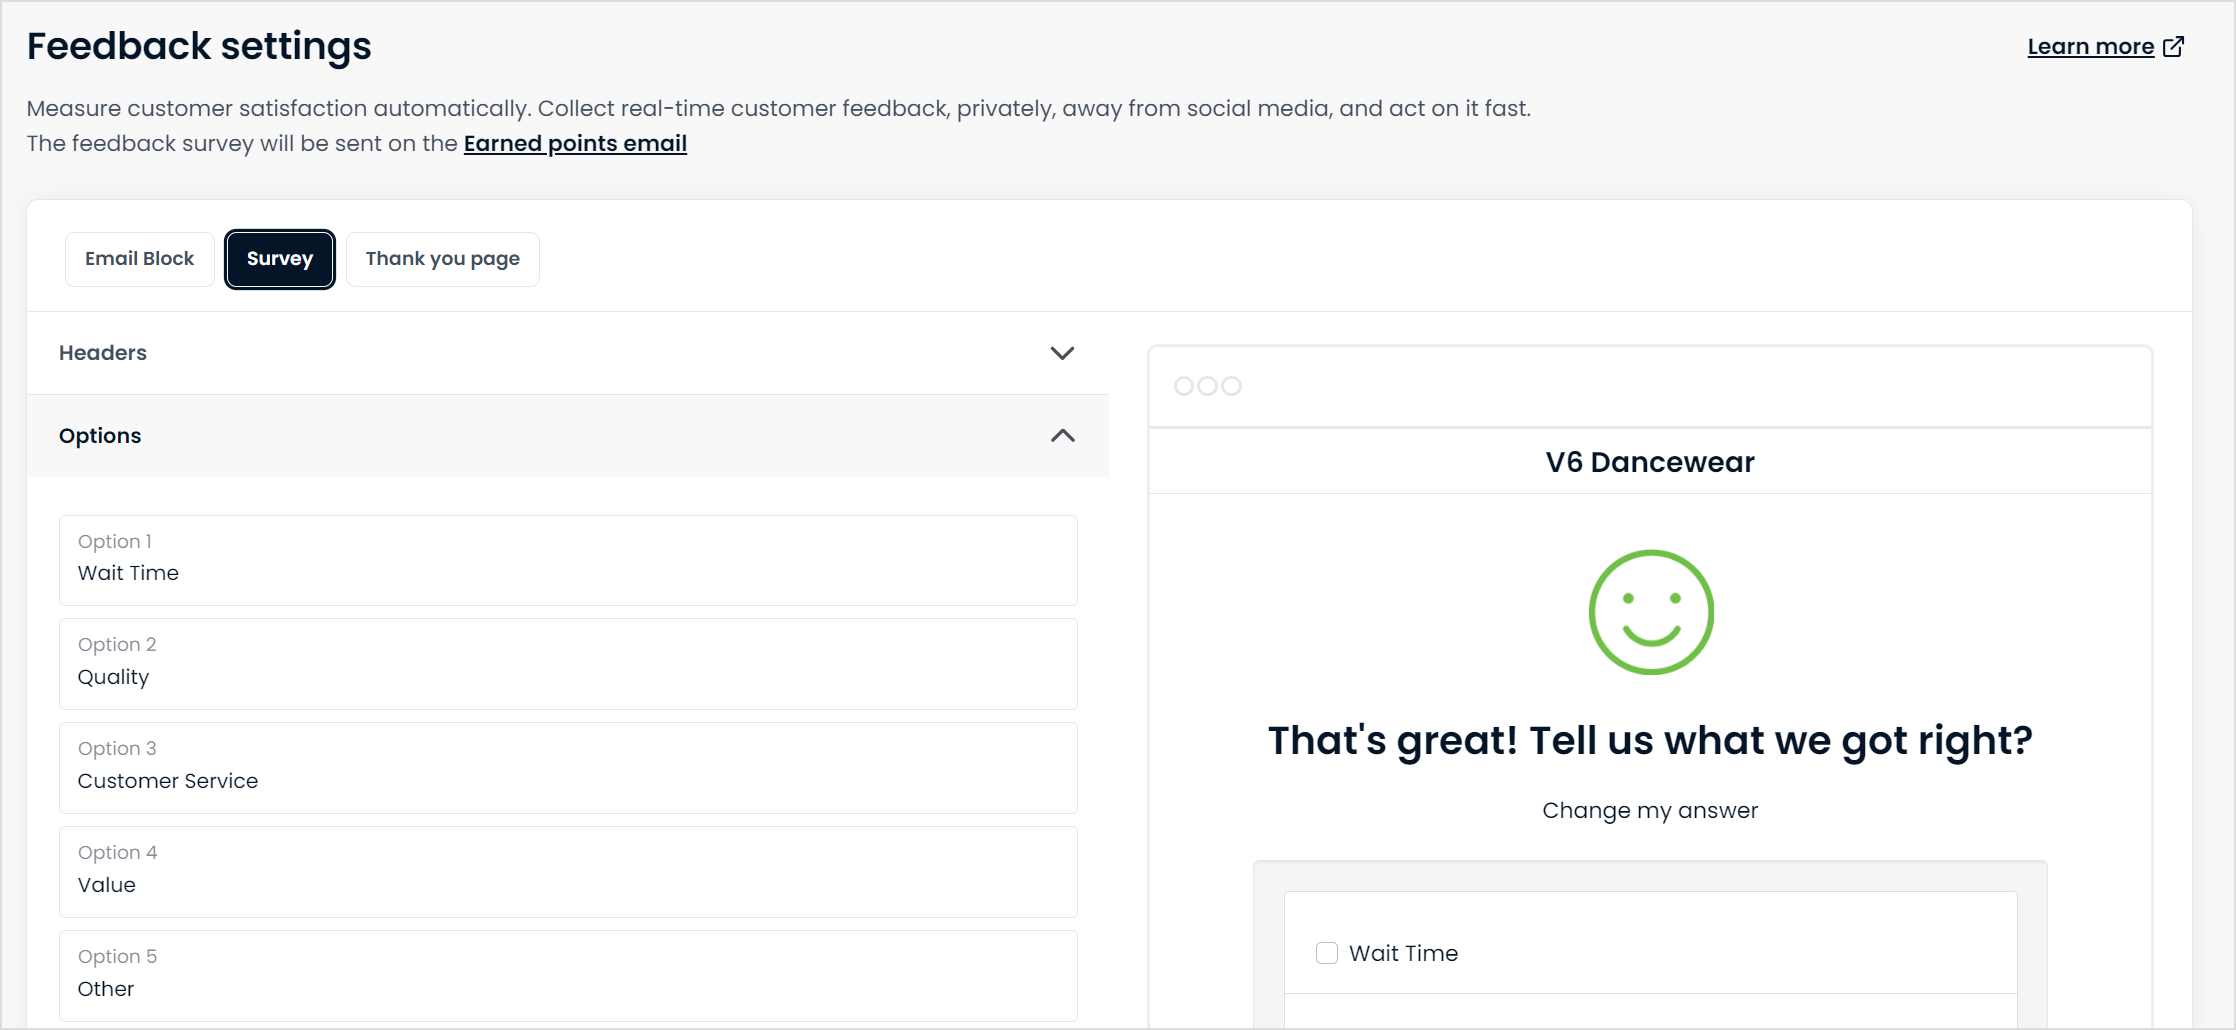
- Under the Other tab, edit the comments placeholder.
This text can help prompt your customers to leave further feedback.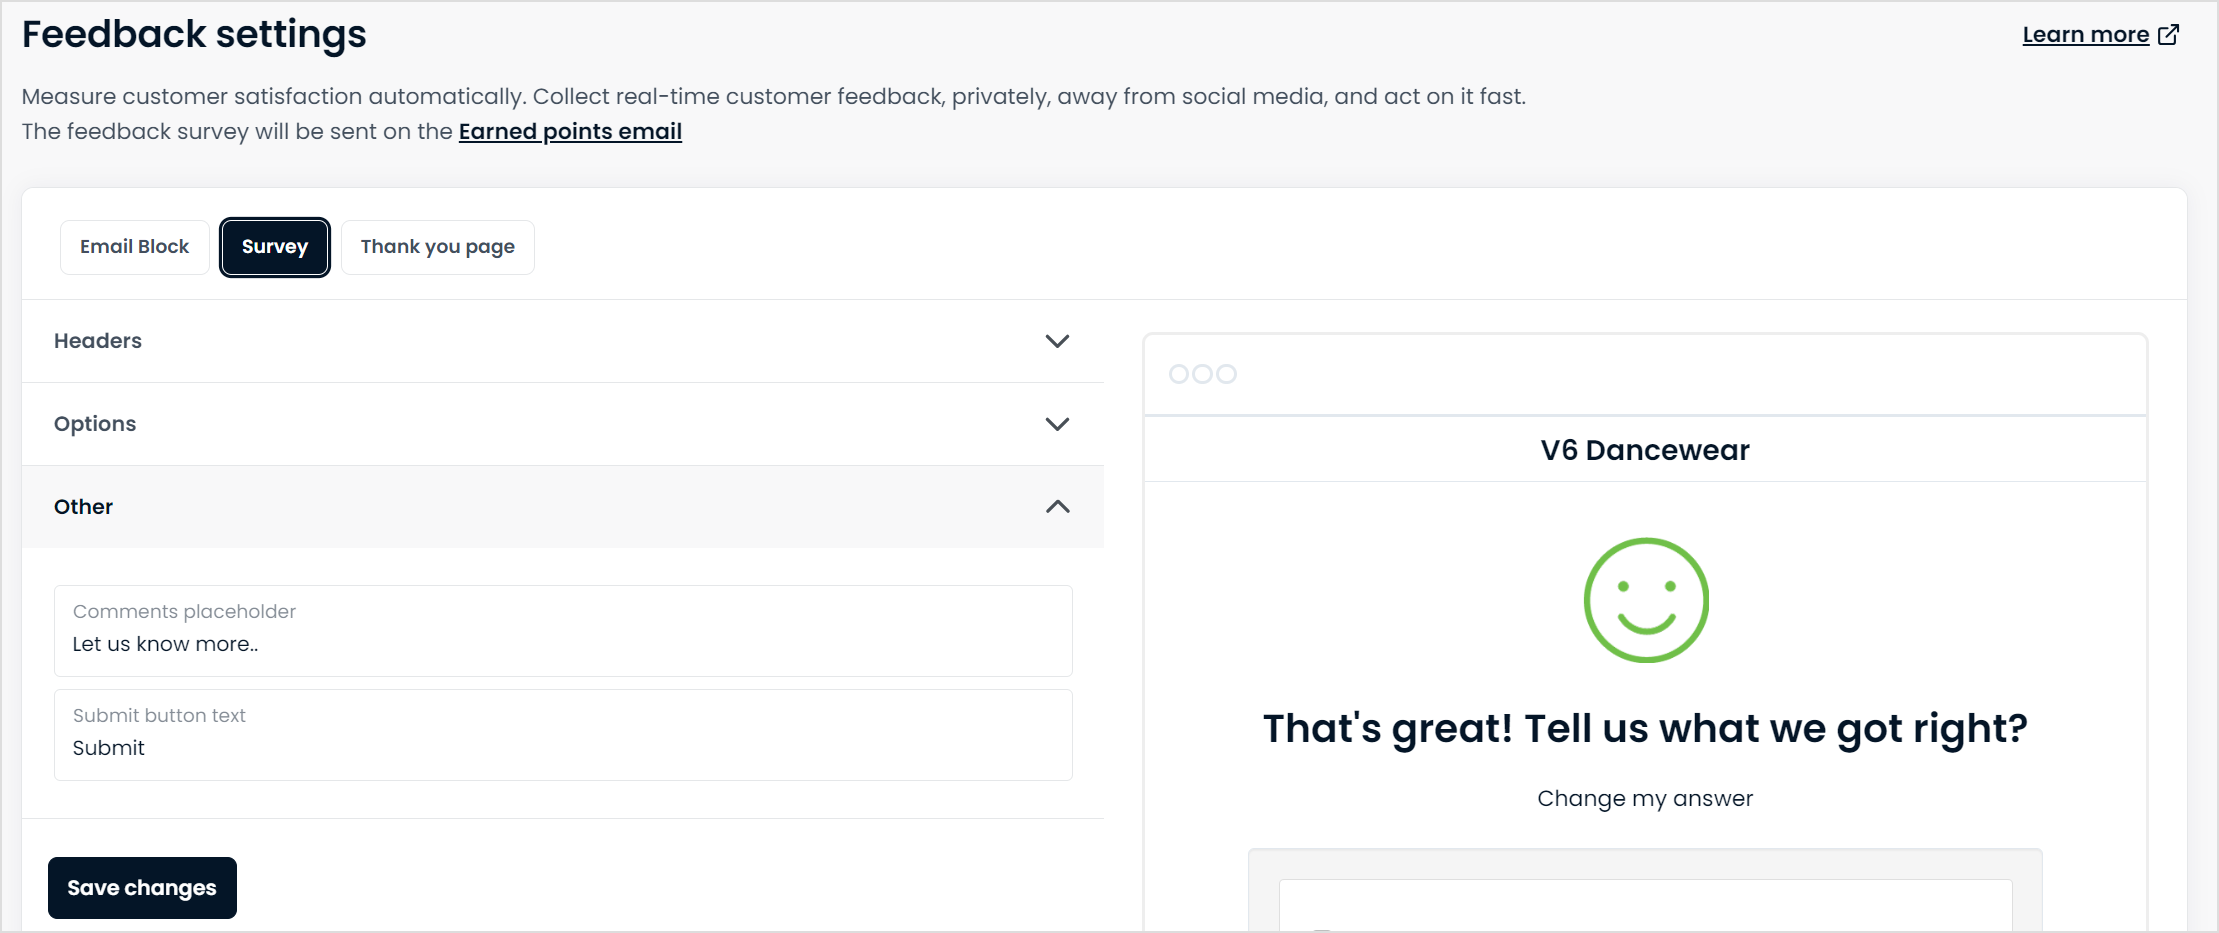
- Here you can also edit the default Submit button text.
- Click Save changes. You can now see a preview of your customized survey on the right side of your screen.
Personalize the 'Thank you page'
When a customer completes a feedback survey, they are directed to a Thank you for your feedback page. Personalize your thank you messages for both positive and negative feedback responses.
💡 Tip: Want to update your thank you page to another language? You can translate it by following the customization steps below.
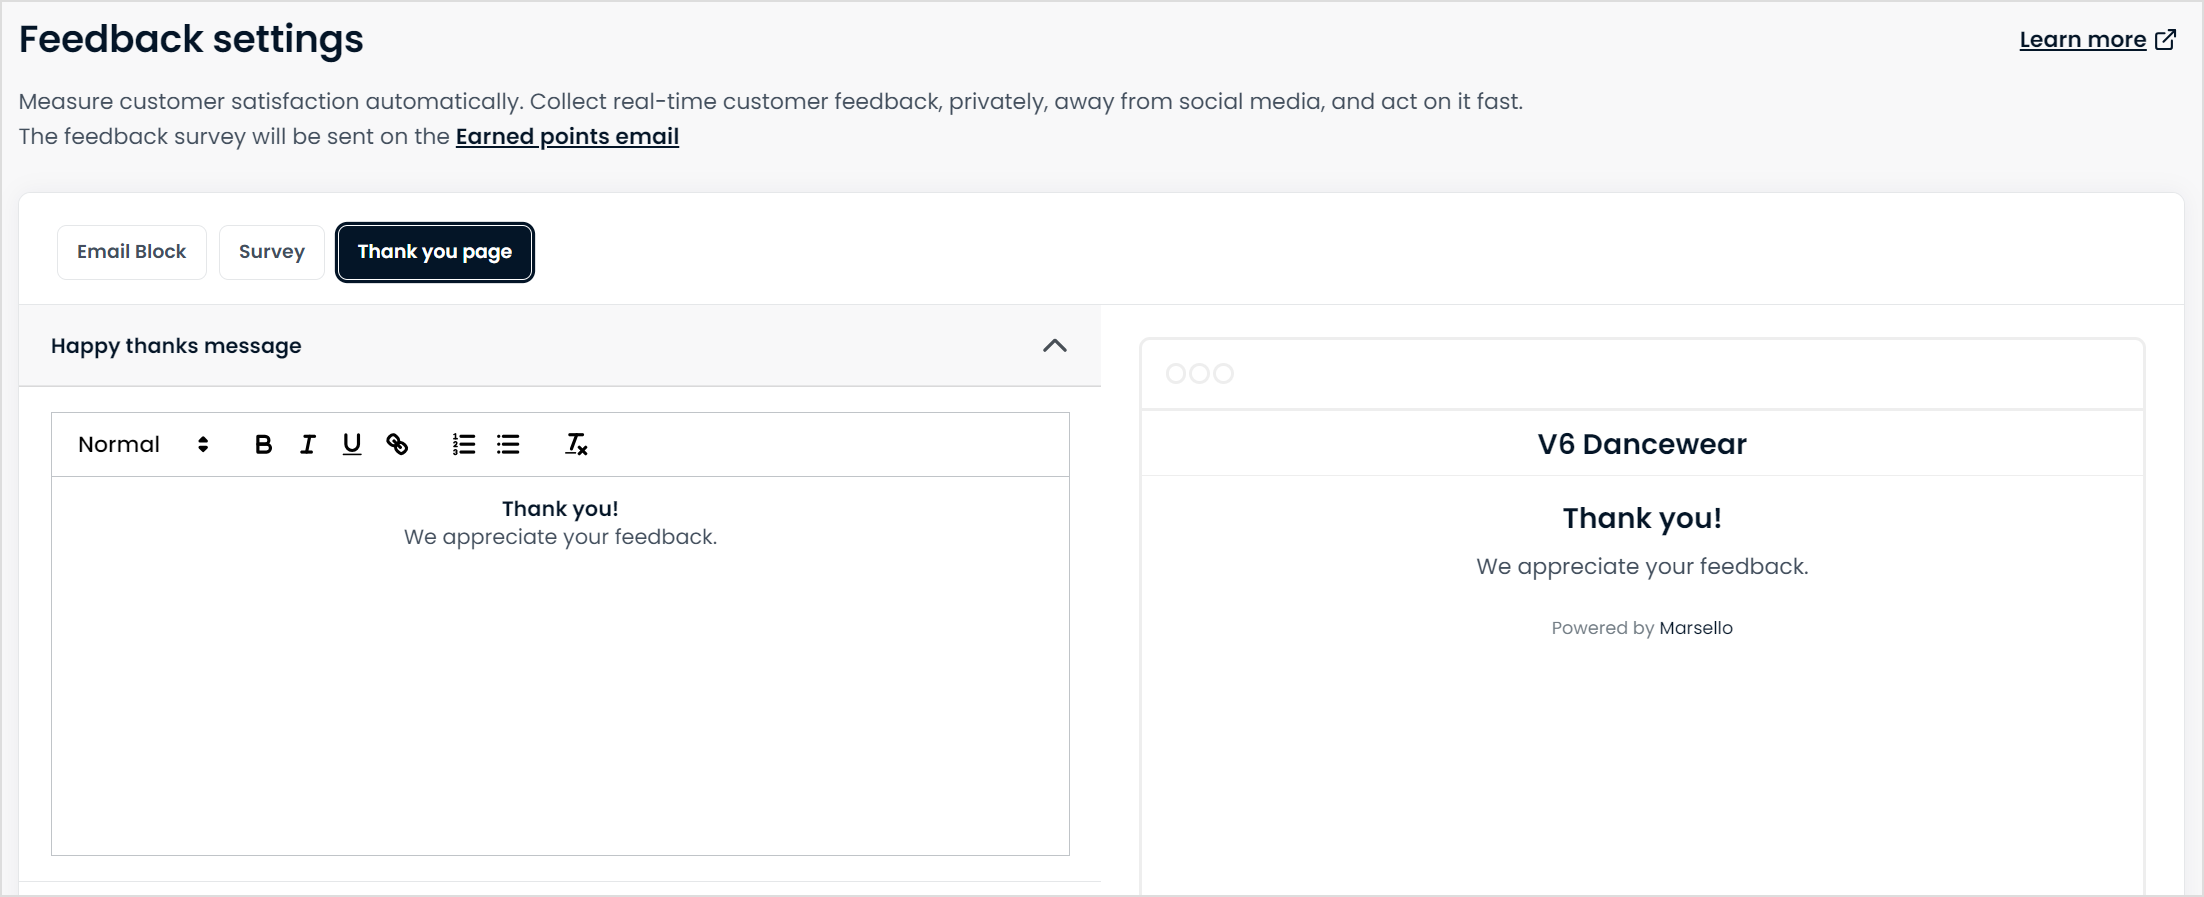
1. Click on the Thank you page tab.
2. Under the Happy thanks message you can customize the response message.
Here you can add:
-
Pictures
-
Videos
-
URL links
-
Customize the font, color, and more
💡 Quick Tip: This is a great opportunity to take action on a customer's positive experience - consider encouraging them to review their product, google review, or share your store on social media!
3. Under the Sad thanks message you can customize the response message.
Here you can add:
-
Pictures
-
Videos
-
URL links
-
Customize the font, color, and more
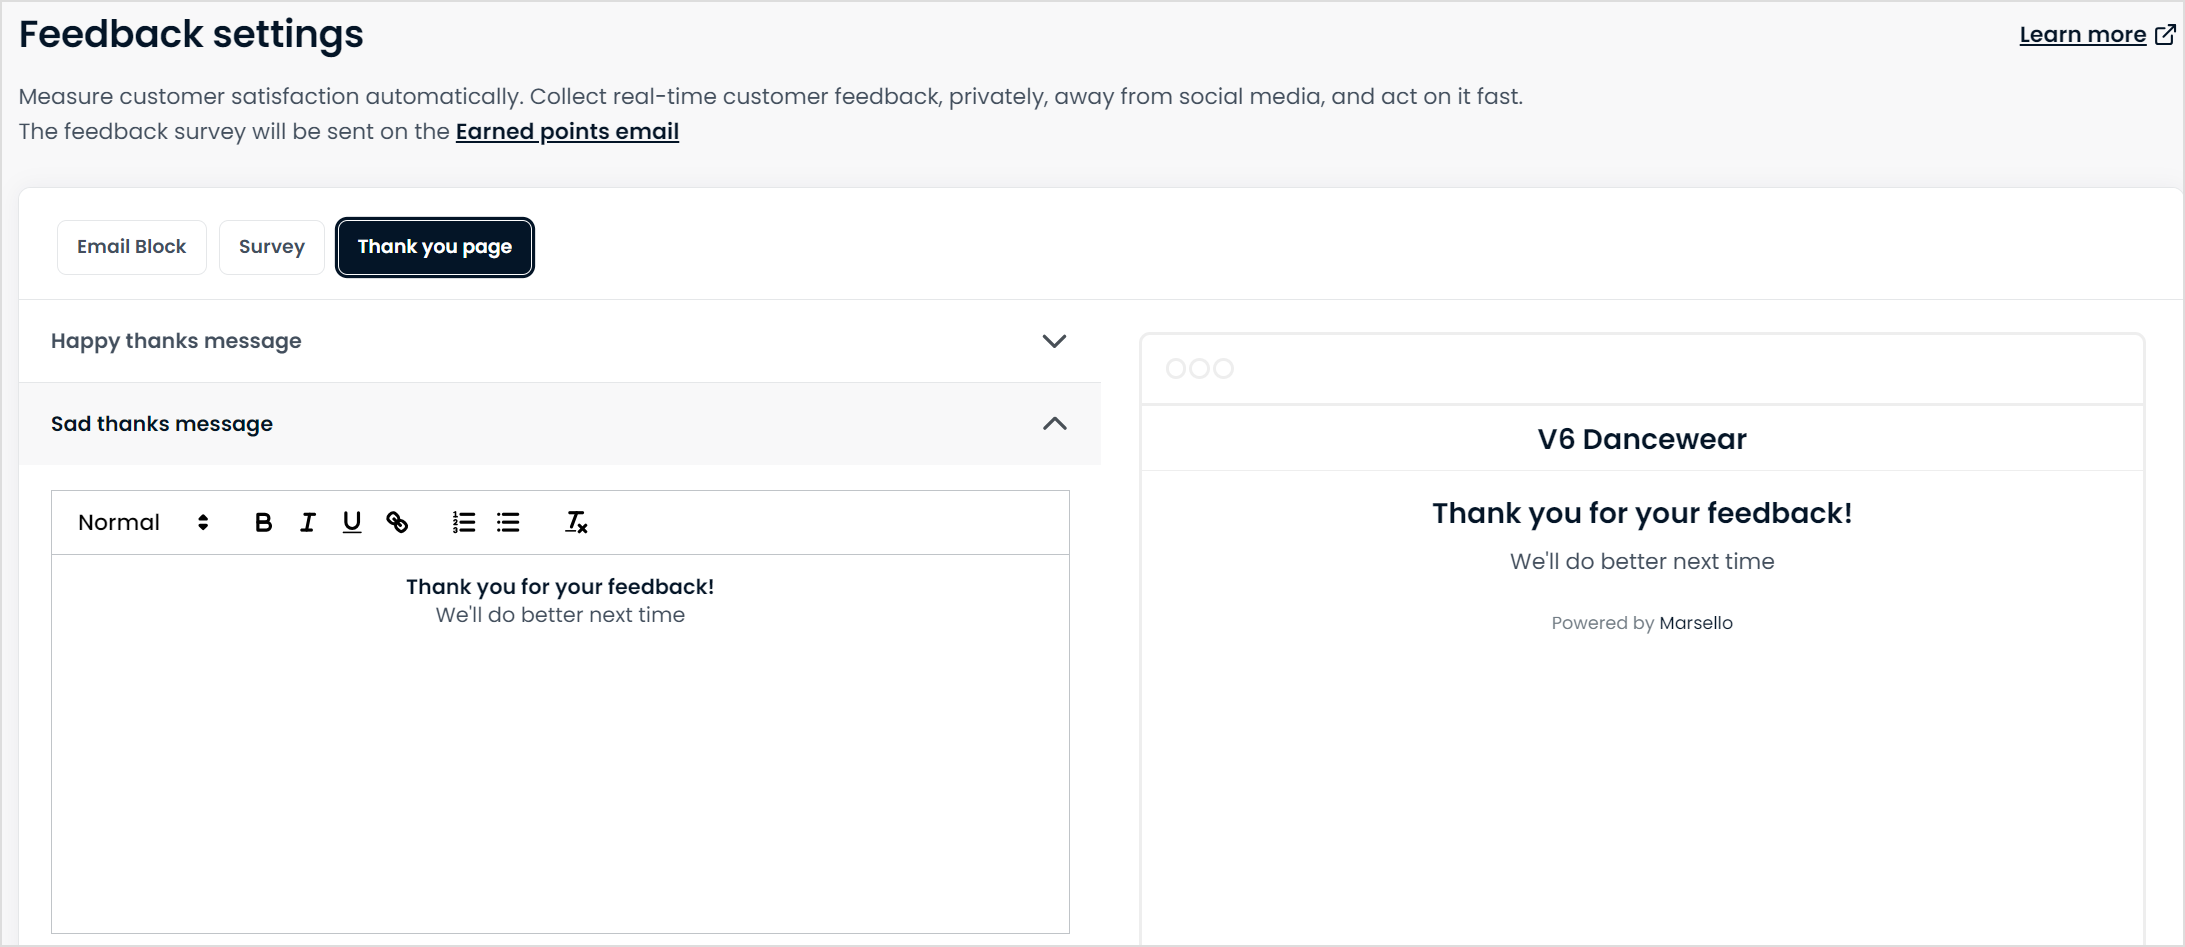
💡 Quick Tip: This is the perfect opportunity to advise your customers that their honest feedback is really appreciated and will be taken on board by your team.
4. Click Save changes.
How to enable your feedback survey
Once you are happy with the customization of your survey, you can enable it to be added to the Points Earned automation.
1. In your app admin, go to Customer > Responses > Feedback
2. Click the toggle to ON to automatically add the feedback email block to your Points Earned automation.
3. On your Points Earned automation, you can see the feedback block merge tag.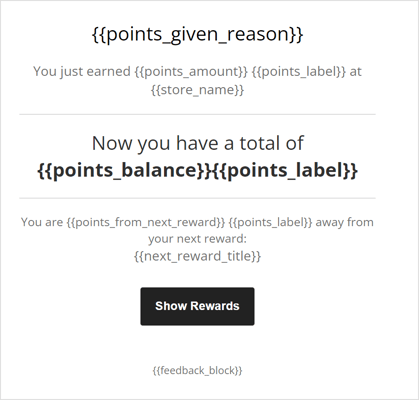
If you do not see the feedback block merge tag in your Earned Points email content, please add this by clicking Edit Template. Copy and paste the ## merge tag from the right-hand panel into your template.
What do customers see when completing the survey?
When your customer makes a purchase, they will receive the Points Earned automation (if enabled and the order has met point-rewarding rules).
In this email content, they will be prompted to click a feedback icon to respond to your customer satisfaction survey.

When they click one of these icons this will open a new browser page with your follow-up questions.

They can then submit their response. This will automatically populate within your private feedback dashboard.
If your customer does not fill in this form but has already clicked the happy or sad face, their original response will still be recorded automatically and their reason will be 'Unspecified'.
📖 Learn More: Understanding your customer feedback responses
What are examples of follow-up survey responses?
It's important to ensure the feedback multi-choice options you provide to customers are relevant to their shopping experience and the location where they made their purchase.
Selling online only:
Identify the specific areas of your online shopping experience that customers love or may need improvement.
Examples of online survey options:
-
Store navigation
-
Product selection
-
Size options
-
Price
-
Checkout process
-
Online customer service
Selling in-store only:
Gain insight into how customers feel when shopping in your store, from the store layout and products to their interactions with staff members.
Examples of in-store survey options:
-
Wait time
-
Product quality
-
Store layout
-
Customer service
-
Staff knowledge
Selling online and in-store:
When selling both online and in-store, you should only include survey options that apply to both shopping experiences.
-
Customer service
-
Product selection
-
Product availability
If you'd like to include specific survey options, be sure to make it clear what shopping medium they refer to, for example:
-
Delivery options (Online store)
-
Wait time (Physical store)
Brands also searched for: surveyvey, woid, heedback, heedbac, heed, feedvb